
A white gaming PC setup has moved beyond aesthetic preference, it’s become a statement of design intention and gaming identity. Whether you’re drawn to the clean minimalist look, the premium feel of monochromatic hardware, or simply want your setup to stand out in a sea of RGB-soaked black builds, building a white gaming rig requires more than just picking white components. It’s about understanding how color consistency, thermal management, cable routing, and peripheral choices all work together to create a setup that’s both visually stunning and performance-ready. This guide covers everything you need to know about assembling, optimizing, and maintaining a white gaming PC setup that’ll turn heads at LAN parties and look incredible on your desk.
Key Takeaways
- A white gaming PC setup stands out visually and signals intentional design choices, but requires more attention to dust management and cable cleanliness than traditional black builds.
- Essential components for a white gaming PC include a quality case like the NZXT H7 Flow RGB or Corsair 4000D, white CPU coolers (Noctua NH-D15S chromax.white), and matching white RGB fans for a cohesive aesthetic.
- Cable management is non-negotiable in white builds—use white or translucent cables, white velcro straps, and route non-essential cables behind the motherboard tray to maintain the premium appearance.
- Proper thermal management with intake/exhaust fan balance, dust filters, and regular cleaning every 2-4 weeks ensures your white gaming PC performs reliably without throttling.
- Budget-friendly white gaming rigs start around $1,165 for 1080p gaming, while mid-range builds at $2,690 handle 1440p ultra settings with performance that remains competitive for 5-7 years with minimal upgrades.
- Complete your white gaming setup with matching peripherals (white mechanical keyboards, mice, and monitors) and optimize ergonomics with proper monitor height, desk positioning, and cable management to enhance both aesthetics and performance.
Why Choose A White Gaming PC Setup
A white gaming PC setup offers distinct advantages beyond pure aesthetics. First, it’s visually distinctive. Most gaming builds default to black cases with RGB lighting, going white immediately sets your rig apart without feeling forced or trying too hard.
Second, a cohesive white build feels intentional. It signals that the builder made deliberate component choices rather than just grabbing whatever was on sale. This matters when showing off your setup at gaming events or on social media.
Third, white components often run cooler visually and sometimes thermally. Light colors reflect heat slightly better than dark ones, though the difference is negligible, what matters more is proper airflow design, which you’ll control regardless of case color.
Finally, white builds photograph better. Stream overlays, YouTube thumbnails, and Instagram posts stand out more with a white backdrop. If you’re into content creation alongside gaming, this is a legitimate advantage.
The downside: maintaining a white build requires more attention to dust management and cable cleanliness. You’ll notice dirt and cable routing flaws faster than in darker cases. If you’re committed to keeping it pristine, the extra maintenance is worth the payoff.
Essential Components For A White Gaming Build
Building a white gaming PC means sourcing specific components that actually come in white or off-white finishes. Not every component is available in white, so you’ll need to be strategic about what you can realistically match.
Case Selection And Design Considerations
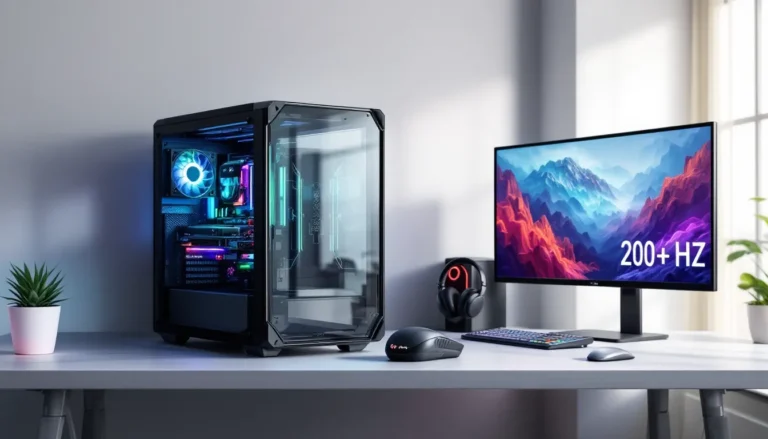
Your case is the foundation of the entire white aesthetic. Popular white cases in 2026 include the NZXT H7 Flow RGB (excellent airflow, includes three RGB fans), Corsair 4000D Airflow (clean minimalist design, great thermals), and Lian Li Lancool 216 (good build quality, affordable). For larger builds, the Corsair iCUE 5000T RGB offers a tempered glass panel that shows off white components beautifully.
Consider these factors when choosing:
- Motherboard clearance: ATX, Micro-ATX, or Mini-ITX will determine your case options and internal layout flexibility.
- GPU length: High-end GPUs can be 300mm+. Measure your case’s GPU bay before committing.
- Fan mounting: Ensure the case supports your cooling solution (AIO radiator size, tower cooler height).
- Tempered glass: Glass panels look premium but are harder to cable-manage cleanly: acrylic is more forgiving.
- Dust filters: White cases show dust faster. Prioritize models with removable, washable dust filters.
Avoid pure white cases if possible, off-white or pearl white ages better and doesn’t yellow under UV light. Test the exact shade before ordering.
GPU And CPU Cooling Solutions In White
Cooling hardware in white is trickier than finding a white case. Few GPUs come in white natively. Your best options:
GPUs:
- Colorware custom paint jobs: Third-party services can spray-coat your existing GPU white. Quality varies: expect to pay $150–$300 for professional work.
- Limited edition white GPUs: Rare drops from ASUS (ROG Strix White Edition) and MSI occasionally appear. Track retailer notifications or overclocker forums for alerts.
- Aftermarket coolers: Replace the shroud on a black GPU with a white custom water block or aftermarket air cooler cooler. This works but voids warranty and requires technical skill.
CPU Coolers:
White CPU coolers are more common. Quality options include:
- Noctua NH-D15S chromax.white: Best air cooler for white builds, excellent cooling capacity (up to 250W TDP), and actually white instead of brown.
- ARCTIC Freezer 50 TR: Compact white tower cooler, good performance-per-dollar.
- NZXT Kraken Z63 or Z73: White AIO liquid coolers with integrated displays, solid performance, though pump noise can be an issue at load.
For AIO coolers, white radiator and pump combos are readily available, but check reservoir opacity, cloudy white looks cheap next to a clean case.
White RGB Lighting And Cable Management
RGB lighting is where white builds really shine. With a white backdrop, RGB colors pop harder and look less claustrophobic than in black cases.
Fan and lighting setup:
- Opt for white fans with RGB rings (Corsair ML RGB Pro, Lian Li UNI Fan SL). They integrate seamlessly.
- Use software sync across all RGB devices (Corsair iCUE, NZXT CAM, ASUS Aura) so lighting is cohesive.
- Avoid mixed RGB ecosystems, limit yourself to two brands max or sync via motherboard headers if possible.
- White fans with white blades + white case = maximum visual cleanliness. Colored fans add flair but break the aesthetic.
Cable management:
This is non-negotiable in white builds. Every cable routing mistake is visible.
- Use white or translucent cables. Corsair Vengeance Series and Lian Li Strimer Plus RGB offer white sleeving.
- Route all non-essential cables behind the motherboard tray or through back-panel management holes.
- Secure bundled cables with white velcro straps or zip ties (black stands out, get white ones).
- If your PSU has black cables, consider a modular PSU with white-sleeved cables or a cable extension kit.
Poor cable management turns a premium build into a tangled mess. Spend the extra time and money here, your future self will thank you when you need to upgrade RAM or storage.
Assembling Your White Gaming Rig
Building a white PC follows the same fundamental steps as any gaming build, but with an emphasis on keeping components pristine and maintaining color consistency throughout the process.
Step-By-Step Build Process
Following a methodical approach prevents damage and ensures you catch compatibility issues early:
-
Prepare your workspace: Clear a large, clean table. Use an ESD mat to prevent static discharge. Avoid carpeted areas if possible.
-
Install the power supply: Mount it in the bottom of the case (fan down if case has ventilation, fan up if not). Secure with four screws. Don’t plug it in yet.
-
Install I/O shield: Place the rear motherboard I/O shield into the case rear opening from the inside. It should click into place.
-
Install motherboard standoffs: Most cases come with pre-installed standoffs, but verify they align with your motherboard’s mounting holes (ATX, Micro-ATX, Mini-ITX differ).
-
Install the motherboard: Carefully lower it into the case, aligning the I/O ports with the shield cutout. Line up all screw holes, then hand-tighten screws first, then power-tighten (don’t overtighten, you’ll crack the board).
-
Install CPU and RAM: Install these while the motherboard is out or while it’s in the case, both work. Follow your specific CPU and RAM manual for installation (Intel and AMD differ: DDR4 and DDR5 differ).
-
Install M.2 SSD: Insert into the M.2 slot at an angle, press down firmly, and screw in place.
-
Install the GPU: Remove rear bracket and slot covers (usually 2). Align the GPU with the top PCIe x16 slot, press firmly until it clicks. Install the rear bracket. Do NOT force it.
-
Install case fans: Mount radiator (if AIO) and fans for intake (front, bottom) and exhaust (rear, top). Generally: push air in front, pull air out rear. Check your case manual for optimal configuration.
-
Cable management: Connect 24-pin ATX power, 8-pin CPU power, PCIe power (6-pin or 8-pin for GPU), and SATA power. Route cables behind the motherboard tray. For white builds, spend extra time here, bad routing kills the aesthetic.
-
Connect case headers: Power button, reset button, power LED, HDD LED connect to motherboard front-panel headers (tiny connectors, reference your motherboard manual).
-
Final check: Verify all power connections are secure. Ensure no cables contact case fans. Double-check RAM is fully seated.
-
Power on: Flip PSU switch, then press case power button. You should see fans spin and lights turn on. If nothing happens, you likely missed a power connection, don’t panic, it’s fixable.
-
Install OS: Boot from a USB stick with Windows 11 (or your preferred OS) and install to your M.2 SSD.
Building is intuitive once you start, the hardest part for first-timers is usually the tiny motherboard connectors. Take your time, consult your motherboard manual, and don’t force anything.
Achieving A Clean, Cohesive Aesthetic
Once your build is functional, shift focus to making it look intentional.
Color matching:
- RAM heatspreaders should be white or matched to your RGB lighting scheme.
- Motherboard accent pieces (VRM heatsinks, RAM slot edges) vary by brand, ASUS ROG boards often come with white accents, MSI MPG boards trend black. Know this before buying components.
- SSD coolers are often black plastic. If visible through your case window, swap it for a white heatspreader or custom cover.
RGB coordination:
- Don’t mix RGB ecosystems. If your motherboard, fans, and AIO are all different brands, use a motherboard RGB header to control everything via one software suite if possible.
- Choose a color scheme and stick to it (all white, gradient, single color accent, etc.). Random colors look amateur.
- Avoid full rainbow cycling, static white or a single accent color (blue, purple, cyan) ages better and isn’t distracting during gameplay.
Cable visibility:
- Run cables behind the motherboard tray whenever possible. Use cable channels and management straps.
- For cables visible through the case window, use white or translucent sleeving. Braided cable extensions from Corsair or Lian Li cost $20–$50 and transform cable appearance.
- Route the 24-pin ATX power along the side of the motherboard, not across it, this is both cleaner and cooler.
Dust prevention:
- Install dust filters on all intake fans and vents.
- Keep the case on a desk or stand, not on a carpet (carpets are dust factories).
- Clean filters every 2–4 weeks depending on your environment. Dust on white components is visible immediately.
Desk Setup And Peripheral Integration
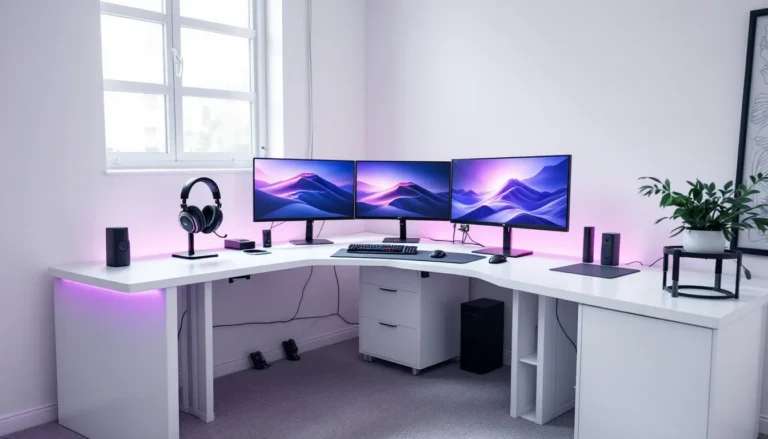
Your PC is only part of the equation. A true white gaming setup extends to your desk, monitors, and peripherals, everything visible when you’re gaming or streaming.
White Monitors, Keyboards, And Mice
Finding white peripherals is easier than finding white GPUs, but selection is still limited compared to black alternatives.
Monitors:
Most gaming monitors come in black or dark gray. Pure white monitors are rare, but off-white or light gray options exist:
- BenQ PD2500Q (design-focused, light beige frame).
- ASUS ProArt PA248QV (white bezel options available, professional color accuracy).
- LG UltraFine 27U88 (white stand, great for creative work + gaming).
Alternatively, mount monitors on white arms or use monitor stands with white paint or wrapping. Your monitor frame matters less than the stand it sits on.
Keyboards:
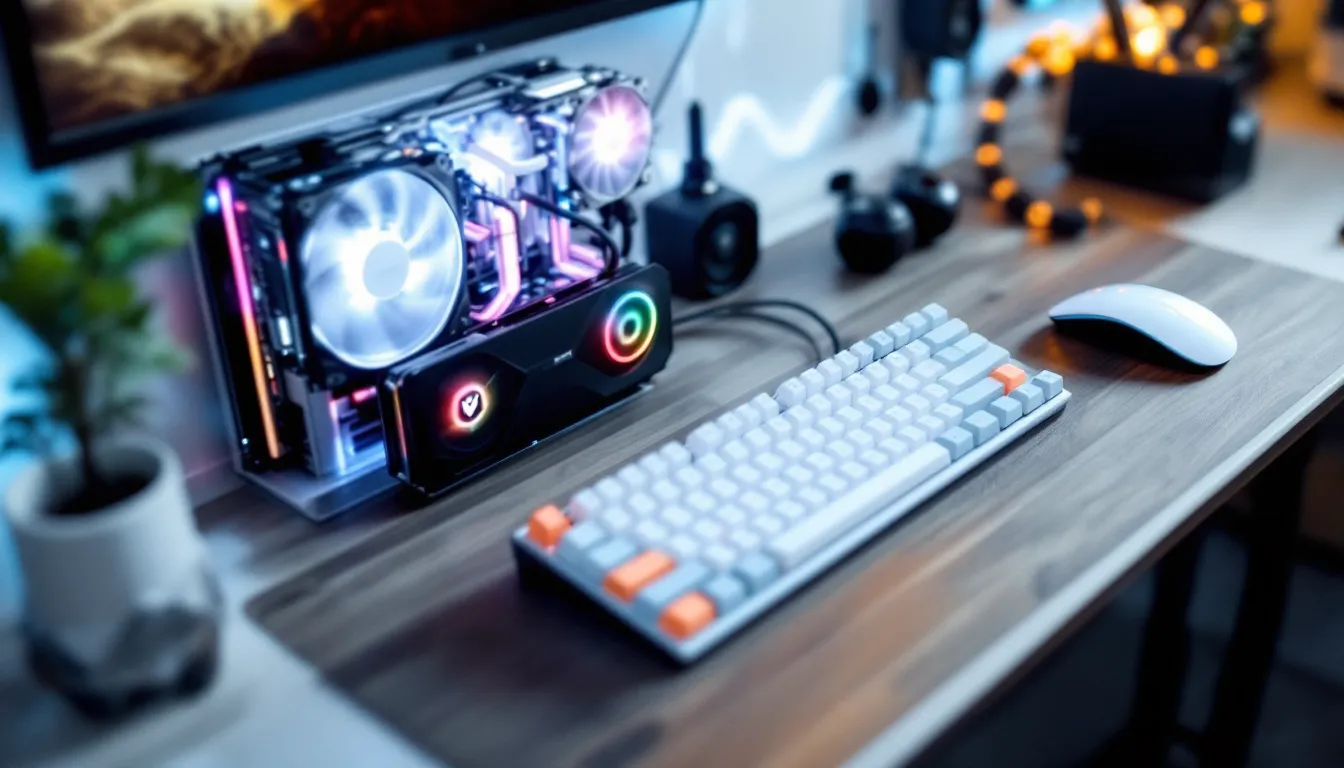
Mechanical keyboards in white are increasingly common. Quality options:
- Corsair K100 RGB (White Edition): Cherry MX mechanical switches, programmed macro keys, premium feel.
- Logitech G Pro X Lightspeed (White): Wireless, mechanical, beloved by esports pros, reliable switches.
- Keychron C2 (White): Budget-friendly mechanical, good build quality, available with hot-swap switches for customization.
- Akko 3084 (Gasket Mount, White): Excellent typing feel, affordable, quality PCB and stabilizers.
White keycaps are available from vendors like Drop, GMK, and Akko. If you want ultra-clean aesthetics, pair a white keyboard with white keycaps (artisan keycaps are available but expensive).
Mice:
White gaming mice are becoming standard. Pros and enthusiasts use them frequently:
- Logitech G Pro X 2 (White): Industry standard for competitive gaming, 32,000 DPI sensor, lightweight, wireless.
- SteelSeries Prime Pro (White Edition): Durable, adjustable weight, trusted by esports teams globally.
- Razer DeathAdder V3 (Mercury): Fast response time, excellent sensor, lightweight ergonomic design.
- Finalmouse UltralightX (Starlight Pro, White): Ultra-lightweight favorite of competitive players, high resale value.
Choosing peripherals informed by pro player preferences ensures you’re using gear tested under competitive conditions. Many esports athletes stream their setups and publish their exact gear, this is valuable research.
Desk Layout And Ergonomics For Gaming
Peripherals are only useful if they’re positioned correctly. Poor ergonomics ruin both performance and long-term health.
Optimal positioning:
- Monitor height: Top of screen at or slightly below eye level when seated with good posture. Neck angle: 15–20 degrees downward. Use a monitor arm or stand to adjust.
- Mouse and keyboard: Elbows at 90 degrees. Forearms parallel to the ground. Keyboard should be at wrist level (not lower). Use a desk pad or keyboard tray if your desk is too high.
- Distance from monitor: 24–30 inches from your eyes. Too close causes eye strain: too far reduces visibility for competitive gaming.
- Chair height: Feet flat on floor or footrest, thighs parallel to ground. Your gaming chair height is critical, cheap chairs ruin posture faster than anything else.
White desk considerations:
- White desks show dust, fingerprints, and coffee spills instantly. Choose a matte finish over glossy (glossy reflects RGB lighting in distracting ways).
- Use a white desk pad or extended mousepad to define your gaming zone and reduce desktop visibility.
- Cable channels under the desk keep white surfaces clean. Run all cables through them, not across the desktop.
- Desk lamps with warm white LED bulbs complement the build without adding heat. Avoid harsh blue LED desk lamps, they clash with most RGB schemes and cause eye strain.
Desk management:
- Keep water bottles and food off your desk surface (spills on white surfaces are nightmares).
- Use a cable tray or management box to hide power strips, USB hubs, and tangled cables.
- Monitor arms free up desk space and allow for better cable routing compared to monitor stands.
- A small white shelving unit next to your desk can hold gaming peripherals, backup controllers, and collectibles, keep it organized.
Optimizing Your White Gaming Setup For Performance
A beautiful build means nothing if it throttles under load or crashes mid-game. Performance optimization ensures your white rig delivers the FPS and stability you built it for.
Software Configuration And Driver Updates
Fresh OS installations and driver updates are foundational but often overlooked.
Windows setup:
- Install Windows 11 (or Windows 10 if you prefer, Windows 12 is incoming). Use an official Microsoft USB or ISO to avoid bloatware.
- Disable unnecessary startup programs and background processes. Open Task Manager, go to the Startup tab, and disable non-essential apps.
- Install chipset drivers from your motherboard manufacturer’s website before everything else. Chipset drivers enable PCIe lanes, USB bandwidth, and other critical functions.
- Update BIOS if there are stability improvements or CPU compatibility updates from the manufacturer.
Driver updates:
- GPU drivers: NVIDIA and AMD release drivers monthly. Visit their official websites (not third-party driver sites). Gaming-specific drivers can improve frame rates by 5–10%.
- Update frequency: Monthly driver updates are standard. Skip beta drivers unless you’re troubleshooting specific issues.
- Driver settings: In NVIDIA Control Panel or AMD Radeon Software, set your power management mode to “Prefer maximum performance” for gaming.
Optimization software:
- Use RGB software (Corsair iCUE, NZXT CAM, ASUS Aura) to set static colors or curves during gameplay. Dynamic lighting drains CPU cycles.
- Disable RGB lighting during competitive gaming if you’re chasing every FPS. RGB is cosmetic: performance isn’t.
Thermal Management And Ventilation
Proper cooling keeps components running at rated speed and extends hardware lifespan.
Case airflow:
- Intake vs. exhaust: Positive air pressure (more intake than exhaust) keeps dust out. Negative pressure (more exhaust) pulls dust inward. Neutral is simplest: equal intake and exhaust fans.
- Front intake, rear/top exhaust is the standard configuration. Hot air rises and exits the rear and top.
- Dust filters: Install filters on all intake fans. Check them every 2–4 weeks and clean with compressed air or a soft brush.
- Blocked vents: Keep space around the case (at least 4 inches on each side). Don’t block vents with books, cables, or furniture.
CPU and GPU cooling:
- CPU temps: Peak temps during gaming should stay under 85°C. If hitting 90°C+, the cooler is undersized or thermal paste needs reapplication.
- GPU temps: Most modern GPUs thermal-throttle at 83°C but perform best under 75°C. Thermal pads and paste degrade over 5–7 years, reapplication can drop temps 5–10°C.
- Monitoring: Use HWiNFO64 (free) to monitor CPU and GPU temps in real-time. Set alerts if temps exceed safe thresholds.
Thermal paste:
Quality thermal paste (Thermal Grizzly Kryonaut, Arctic MX-6, Noctua NT-H2) costs $10–$20 but makes measurable difference. Reapply every 3–5 years or if you remove and remount coolers.
AIO maintenance:
- Check coolant levels annually (not all AIOs are refillable, check your model).
- Pump noise increasing over time indicates air in the coolant loop. Tilting the case to reposition the pump/reservoir can sometimes help.
- Most AIOs last 5–7 years. Plan for replacement before failure.
Gaming at 60–144 FPS with proper thermals is better than reaching 200 FPS while thermally throttling at 95°C. Thermal stability = performance stability.
Popular White Gaming PC Builds For 2026
Building entirely from scratch is daunting. Here are realistic component configurations for different budgets, all leaning toward white/light color schemes where possible.
Budget-Friendly White Gaming Rigs
$800–$1,200 Build (1080p high-settings gaming):
| Component | Recommendation | Notes |
|---|---|---|
| Case | Corsair 4000D Airflow (White) | Clean design, excellent thermals, ~$75 |
| PSU | MSI A850GF 850W | 80+ Gold, modular, ~$100 |
| Motherboard | MSI B550-A PRO | Solid mid-range, PCIe 4.0, ~$110 |
| CPU | AMD Ryzen 5 5600X | 6-core, strong 1080p gaming, ~$200 |
| GPU | RTX 4060 Ti | 8GB VRAM, 1080p medium-high, ~$400 |
| RAM | Corsair Vengeance RGB PRO (White, 32GB DDR4) | 3200MHz, ~$90 |
| SSD | Samsung 980 Pro 1TB | PCIe 4.0, ~$90 |
| CPU Cooler | Noctua NH-D15S chromax.white | Excellent budget cooler, ~$110 |
| Case Fans | Stock + 2x Corsair ML RGB Pro | Additional intake, ~$60 |
| Total | ~$1,165 |
This build handles 1080p competitive gaming at 100+ FPS in most titles and 1440p at 60–90 FPS in newer AAA games.
Mid-Range And High-End White Builds
$1,800–$2,400 Build (1440p ultra gaming):
| Component | Recommendation | Notes |
|---|---|---|
| Case | Corsair iCUE 5000T RGB (White) | Premium case, excellent cooling, tempered glass, ~$300 |
| PSU | Corsair RM1000x Shift 1000W | 80+ Gold, fully modular, white cables optional, ~$200 |
| Motherboard | MSI MPG X870E-E CARBON WIFI | Latest platform, PCIe 5.0, integrated WiFi, ~$350 |
| CPU | AMD Ryzen 7 9700X | 8-core, high gaming performance, ~$400 |
| GPU | RTX 4070 Ti Super | 12GB VRAM, 1440p high/ultra, VR capable, ~$800 |
| RAM | Corsair Dominator Titanium DDR5 (32GB) | 6000MHz, premium RGB, ~$150 |
| SSD | Samsung 990 Pro 2TB | PCIe 4.0, fast load times, ~$140 |
| CPU Cooler | NZXT Kraken Z63 (White) | 280mm AIO, integrated display, ~$200 |
| Case Fans | 3x Corsair iCUE LINK QX120 | Premium RGB sync, ~$150 |
| Total | ~$2,690 |
This handles 1440p ultra settings in any 2026 game at 100+ FPS and is VR-ready.
$3,000–$4,500+ Build (4K gaming / streaming):
For creators and enthusiasts:
- GPU: RTX 4090 (flagship gaming and streaming performance) or RTX 4080 Super (balanced).
- CPU: Intel Core i9-14900KS or AMD Ryzen 9 7950X3D (multicore powerhouse).
- Case: Premium white builds: Lian Li O11 Dynamic EVO or Corsair 7000D Airflow.
- Cooling: Dual 360mm AIOs or custom loop (white coolant available but requires maintenance).
- RAM: 64GB DDR5 for streaming + gaming simultaneously.
- Expected total: $3,500–$4,500.
Research builds on established PC gaming resources to verify current pricing and performance metrics. Hardware refreshes happen every 12–18 months, specs that were high-end 2 years ago are mid-range now.
Maintenance And Upgrades For Long-Term Success
A white gaming PC is an investment. Proper maintenance ensures it stays functional and looking pristine for years.
Routine cleaning:
- Monthly: Vacuum or blow out dust filters with compressed air. Don’t let dust accumulate, it’s an insulator and kills cooling performance.
- Quarterly: Open the case and gently clean internal components with a soft brush or compressed air. Avoid touching circuit boards (static risk).
- Annually: Reapply thermal paste to CPU cooler. Clean RAM and SSD connectors with a pencil eraser if thermals creep upward.
Cable and RGB maintenance:
- White cables show dirt. Wipe them down with a microfiber cloth every 3 months.
- Check RGB connections annually, look for bent pins or loose headers. Tighten if needed.
- If RGB stops working on specific fans, the header or cable is likely bad. Individual replacement is cheaper than buying new fans.
Upgrades and component lifespan:
- GPU: Typically needs refresh every 4–6 years to maintain high FPS in new titles. Custom cooler paint jobs can match white aesthetics.
- CPU: Lasts 7–10 years functionally, but gaming performance plateaus after 5 years. Plan CPU + motherboard combos for upgrades.
- RAM: DDR4 is sufficient for gaming through 2026: DDR5 is only necessary for high-refresh streaming or workstation builds.
- SSD: Enterprise SSDs last 10+ years: consumer drives typically 5–7 years. Keep backups regardless.
- Power supply: Quality PSUs (80+ Gold or better) last 7–10 years. Don’t cheap out here, a failing PSU can destroy your entire build.
- Case: Lasts indefinitely if not physically damaged. Upgrade only if thermals suffer or you want a redesign.
Future-proofing:
- Build with future upgrades in mind. A case that supports larger GPUs and radiators is more adaptable.
- Buy modular PSUs (allow cable replacement without full swap).
- Choose motherboards with two M.2 slots minimum (easier SSD upgrades).
- Opt for DDR5 RAM if budgeting $2,000+, it’ll age better than DDR4 by 2028.
A well-maintained white gaming PC can look and perform like new for 7+ years with minimal additional investment.
Conclusion
Building a white gaming PC setup is a rewarding project that merges aesthetics with performance. The process requires attention to detail, color matching, cable management, thermal optimization, but the payoff is a rig you’ll actually want to show off.
Start with your case and work outward: choose quality components in white or complementary finishes, invest in proper cooling and cable management, and integrate white peripherals and furniture that complete the vision. Don’t sacrifice thermals or performance for aesthetics. A white build that throttles is worse than a black build that doesn’t.
Know that true white components are rarer than black alternatives, but the gaming market is responding. With each hardware generation, more options in white finishes appear. If exact color matching isn’t possible, aim for consistency in tone and finish type (matte vs. glossy, cold white vs. warm white).
The maintenance commitment is real, white shows dust immediately, but regular cleaning takes 15 minutes monthly. Plan for component upgrades every 5–7 years, and your white setup will stay competitive and pristine for the long haul.
Your white gaming PC setup is a reflection of your gaming identity. Build it thoughtfully, maintain it properly, and it’ll serve you well through multiple gaming generations.